
Research figures, with room to revise
Explain biomedical mechanisms through a clear illustration
Draft a disease pathway, treatment mechanism or biological process with FigEditor, then check the biology and labels.
Inspect the output before editing: generated regions may be raster images, and tracing does not recover the original drawing objects or guarantee editable labels.
What a medical illustration should communicate
A medical illustration explains a mechanism, an anatomical relationship or a clinical process to an audience that already knows the subject. Its value is precision: the right cell, the right compartment, the right direction of effect.
FigEditor drafts a composition from your description and leaves the biology to you. Treat the draft as a layout, then check every structure, label and arrow against an authoritative source before the illustration is published or taught from.
- Correct scale relationships
- Relative sizes of cells, molecules and tissue layers carry meaning; do not adjust them purely for visual convenience.
- An explicit visual vocabulary
- Decide how activation, inhibition and transport are drawn, then use those forms consistently.
- A level matched to the audience
- A patient handout and a review figure need different amounts of detail from the same mechanism.
Figure examples
Browse figure examples
Layouts and styles researchers actually use. Open any of them in the workspace as a visual reference and write your own prompt.
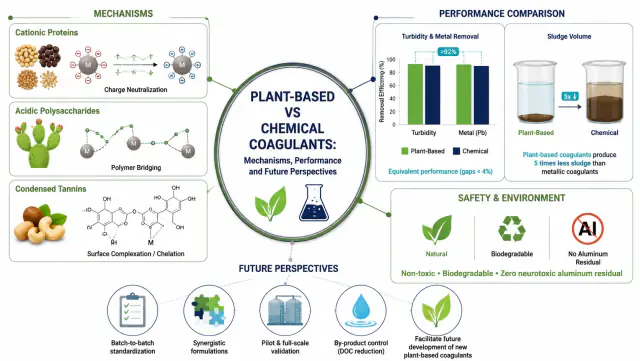
Plant-based and chemical coagulation mechanisms
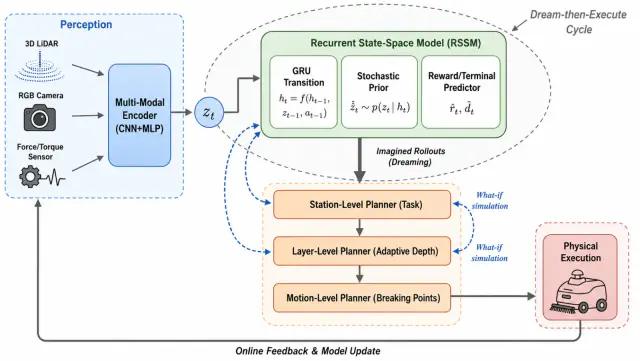
World-model robotic planning workflow

Algae carbon-to-biopolymer graphical abstract
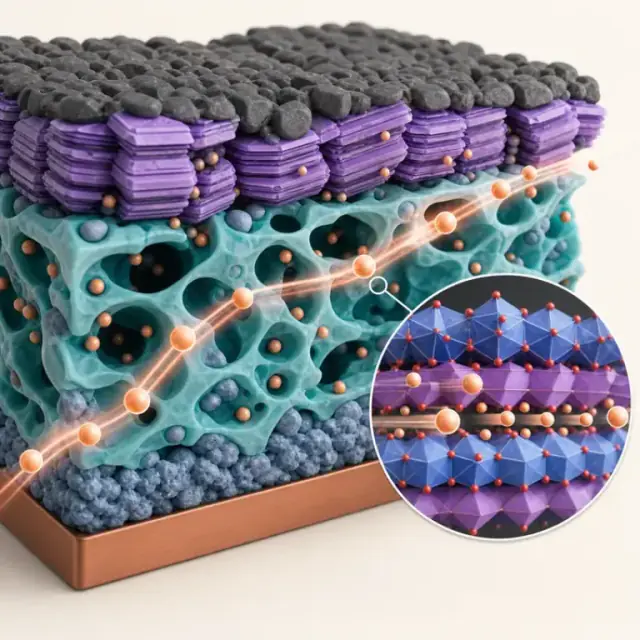
Solid-state battery electrode microstructure
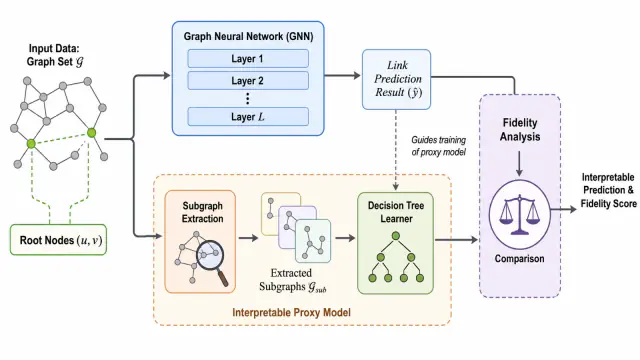
Interpretable graph neural network link prediction
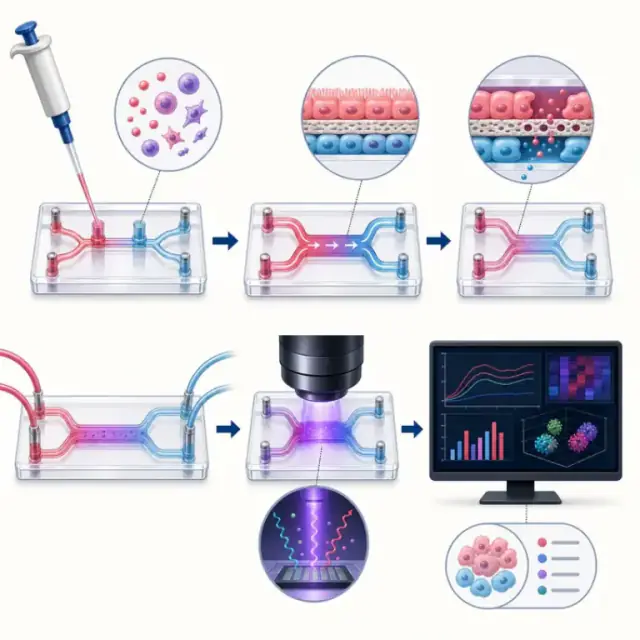
Microfluidic organ-on-chip workflow

Multimodal AI safety evaluation graphical abstract

Oxidation-reduction control of iron-oxide microstructure
Draft first, correct second
Generate the first version of the figure, then fix labels, arrows and emphasis in the editor instead of drawing the whole panel again.
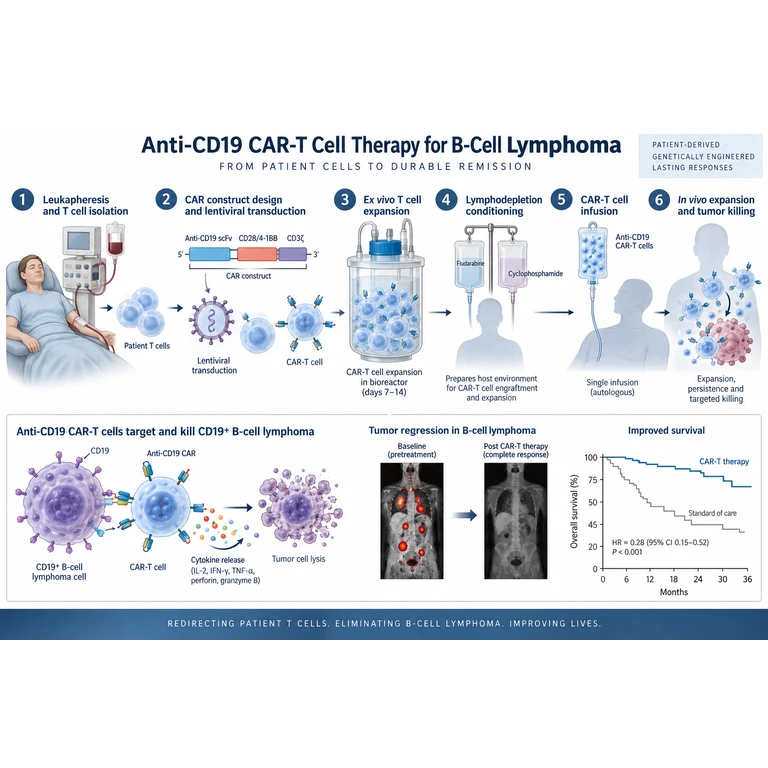
Keep the versions you compare
Every generation and edit is saved, so you can weigh two directions and return to an earlier draft without rebuilding it.
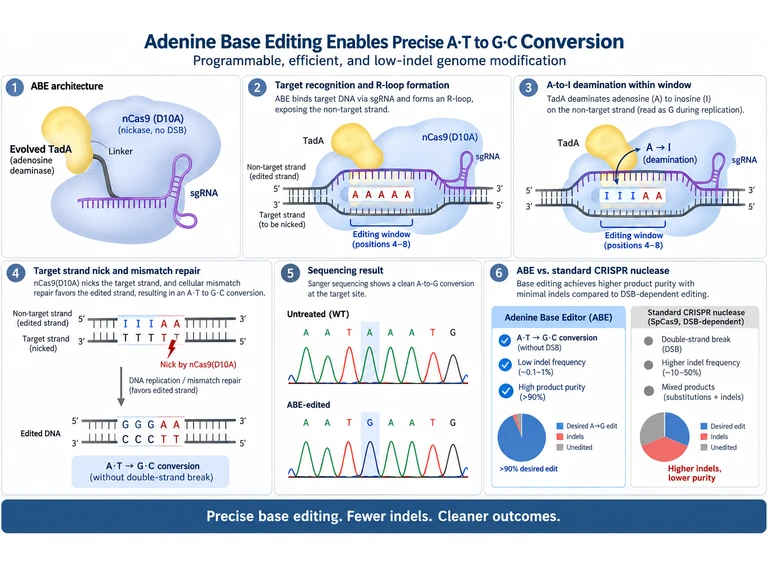
Export something you can still edit
Take a high-resolution PNG for a draft or an editable SVG when the figure still has to change inside PowerPoint, Illustrator or Figma.
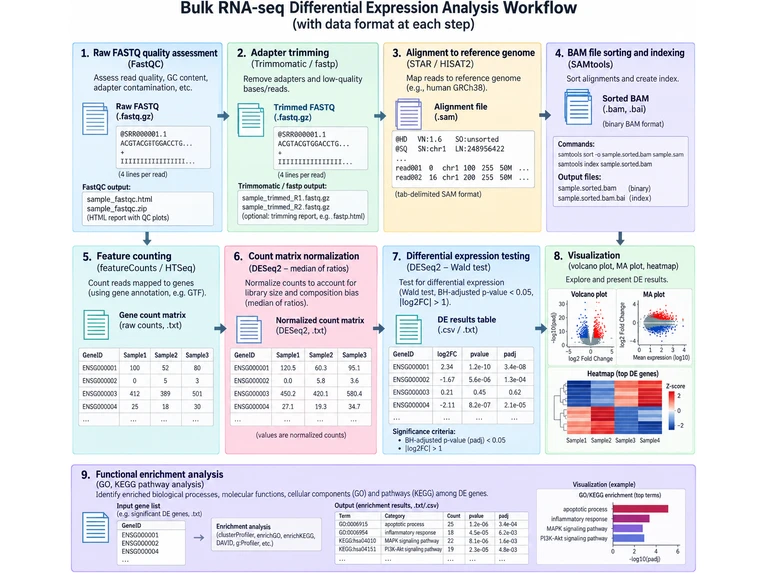
Common mistakes in medical illustrations
Plausible but incorrect anatomy
A generated draft can place a structure in the wrong compartment. Have a clinician or domain expert review the shapes, not only the labels.
Paths that imply the wrong mechanism
If the draft draws activation as a plain arrow, correct the notation; it is part of the scientific claim.
An uncited reference
When a figure is adapted from published work, the source and its licence belong with the figure.
Format choices for medical artwork
| Setting | What applies | Why it matters |
|---|---|---|
| Publication figure | Journal column widths and minimum type sizes apply as for any other artwork. | Plan panel letters and annotations at the final printed size. |
| Presentation use | Projected slides favour larger type and fewer simultaneous labels. | Export a slide-shaped version from the same project instead of re-cropping the print figure. |
| Patient-facing material | Plainer language and fewer abbreviations are expected. | Replace jargon inside the artwork itself, not only in the caption. |
| Sensitive content | Some audiences and publishers restrict graphic depictions. | Check the destination's editorial policy before publishing clinical imagery. |
Requirements depend on where the illustration will appear: journal, slide deck, patient material or regulatory document.
A workflow you can inspect
Define the research brief
List the entities, relationships, labels and visual emphasis. Add only research information you can support.
Review the draft
Compare the generated figure with your evidence. Correct terminology, missing steps and misleading relationships.
Refine and export
Continue with the editor and inspect the downloaded file before using it in a paper or presentation.
FAQ
Questions before you start
Can I bring a reference or sketch?
The generation workspace accepts a research description and reference images. Use references you have permission to use and review the resulting interpretation.
Is the result scientifically verified?
No. A generated draft needs review by someone who understands the research, including labels, directions, units and claims.
What should I prepare before generating?
List the entities, the relationships between them, the reading direction and the labels you need. A clear brief makes the first draft faster to check.
Where do I go after the draft?
Review the draft in the workspace, then adjust labels and shapes in the editor and export the version you have verified.
How do I choose a tool?
For an existing bitmap, use SVG conversion. For an existing vector file, open the SVG editor. For a new research visual, start with the generation workspace.
Ready to start on your next figure?
Bring a description, sketch or reference image into the workspace and finish the draft yourself.